


HOW TO SETUP SMA WIFI |
Posted: August 6, 2020 |
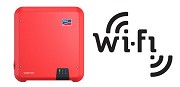
Setting up your SMA Wi-Fi bears many benefits including remote fault diagnosis, real-time monitoring, easy access to SMA online platforms and so on. The new SMA Inverter comes with built-in Wi-Fi and an Ethernet port for monitoring. But before you start setting the Wi-Fi, you must keep a smartphone or tablet handy. Also, make sure that you have taken a picture of Serial number, PIC and RID. The information then will be readily available to you for any future reference. Now that you have all the required things and information ready, here is a step by step guide of How to setup SMA Wi-Fi. 1. You will need to start by connecting the solar inverter. There are two different ways of doing so, you can either use Wi-Fi (the wireless network) or the Ethernet cable for connection. To connect using Wi-Fi, access the Wi-Fi settings of your devices and detect the Wi-Fi which will be in the format SMA19xxxxxxxx. If you are installing for the first time, then the Wi-Fi password will be SMA12345. The Initial Solax Inverter set-up will take place through Installation Assistant and the password will change to the WPA2-PSK password that is written on the label. Also, remember that the initial password will change to the above password after 10 hours of operation, whether or not the set-up has been performed. 2. Once this is connected, you will need to visit your web browser and type the IP 192.168.12.3 in case of WLAN / wireless / Wi-Fi connection and the IP 169.254.12.3 in case of an Ethernet connection. This will direct you to Sunny Boy web user interface. You will need to perform the initial configuration by logging in as Installer and changing the User Group dropdown. It will then ask you to create a password that will be used to register the Fronius inverter in their official portal. 3. After logging in, you will have to set up the Solaredge Inverter using the “Installer Assistant”. If the option of configuration does not appear, then the option can be selected from the top right-hand corner of the screen. Next, you will need to synchronize your 3 Phase Solar Inverter with the wireless network. Click on the WLAN tab and then search and select the local wireless network to which the Off Grid Solar Inverter is connected. Next, enter the password and click on connect. The next IP address will be assigned to the zeversolar inverter by the router if DHCP is enabled. The new IP address will then be shown on the configuration page. Then click on Save followed by next. Then do as it is directed on the screen as prompted by the Installation Assistant. The new-age SMA inverter is equipped with Wi-Fi and Ethernet for your convenience. Connecting to the local network is easy and the whole process can be completed using the above three simple steps. Just follow the instructions carefully, and perform the steps one after another as given in the guide. To browse the latest range of the best SMA solar inverters, visit Solar NextGen today!
|
|||||||||||||||||||||||||||||||||||||||||||
|
|||||||||||||||||||||||||||||||||||||||||||